
Build a GitHub Blog using Jekyll
Jekyll is a static site generator created by Tom Preston-Werner, a founder and former CEO of GitHub. Jekyll is written in Ruby and generates a complete website from files written in markup languages such as Markdown and HTML.
Jekyll is particularly popular among developers because it integrates well with GitHub. It allows users to publish and manage websites directly from their Git repositories.
This post will explain how to create a GitHub blog and customize basic settings and themes using Jekyll.
1. Installation
There are thousands of themes for Jekyll. You can browse and choose a theme from the site below;
The theme that I will use in this blog is ‘Minimal-Mistakes’.
To install the theme, simply fork the minimal-mistakes to your repo, then rename it to USERNAME.github.io — replacing USERNAME with your GitHub username.

2. Deploy the GitHub page
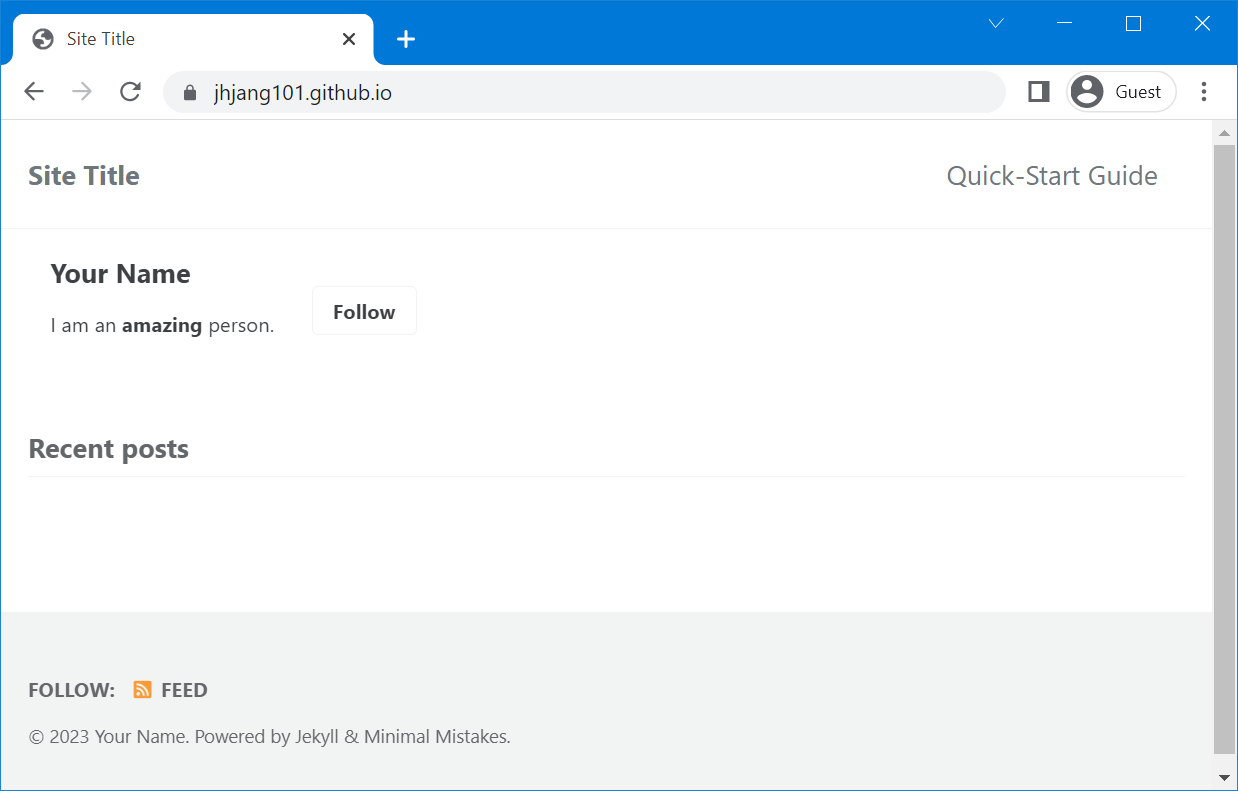
After fork, go to Settings-Pages and set the Branch to master. It will start to build the git page and you can see the workflow in Actions. Once completed, the git page will be online and the address is
You can remove unnecessary folders and files:
.editorconfig.gitattributes.github/docs/testCHANGELOG.mdminimal-mistakes-jekyll.gemspecREADME.mdscreenshot-layouts.pngscreenshot.png
Be sure to update Gemfile in your repo as well. To properly setup a Gemfile please follow the “Install Dependencies” section on the minimal-mistake website and use the following Gemfile:
source "https://rubygems.org"

# Hello! This is where you manage which Jekyll version is used to run.
# When you want to use a different version, change it below, save the
# file and run `bundle install`. Run Jekyll with `bundle exec`, like so:
#
#     bundle exec jekyll serve
#
# This will help ensure the proper Jekyll version is running.
# Happy Jekylling!

# gem "github-pages", group: :jekyll_plugins

# To upgrade, run `bundle update`.

gem "jekyll"
gem "minimal-mistakes-jekyll"

# The following plugins are automatically loaded by the theme-gem:
#   gem "jekyll-paginate"
#   gem "jekyll-sitemap"
#   gem "jekyll-gist"
#   gem "jekyll-feed"
#   gem "jekyll-include-cache"
#
# If you have any other plugins, put them here!
# Cf. https://jekyllrb.com/docs/plugins/installation/
group :jekyll_plugins do
end
3. Managing GitHub from local computer
To manage the site from local server, you need to install Ruby and Jekyll.
- Download and install a Ruby+Devkit from RudyInstaller Downloads.
- Run the
ridk installstep on the last stage of the installation wizard. From the options, chooseMSYS2 and MINGW development tool chain. - Install Jekyll by open a command prompt and run
gem install jekyll bundler. You can check if Ruby and Jekyll is properly installed:ruby -vandjekyll -v. - From local clone folder of your repo, run
bundle installto install the dependencies specified in theGemfile. - Build the site and make it available on local server:
bundle exec jekyll serve. - That is all! You can check the site from http://localhost:4000
4. Configuration
Now, It is a time to change the site setting. The settings are stored in _config.yml in the root. You can change skin and set site title and description here.
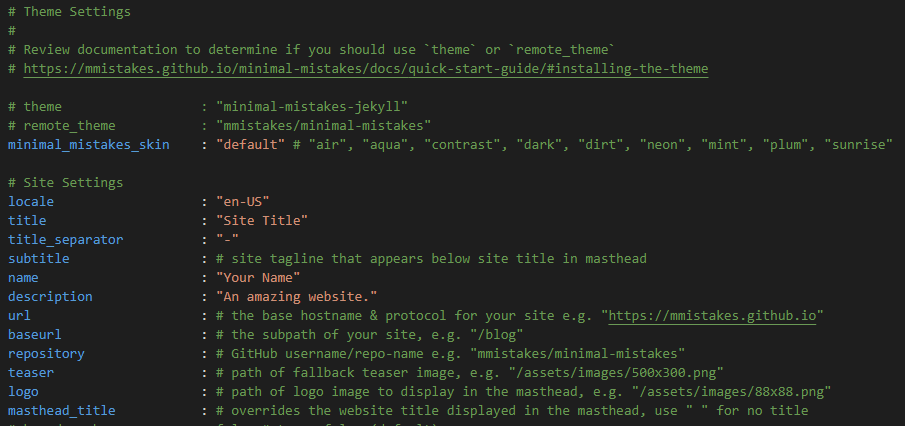
After editing _config.yml, run bundle exec jekyll serve again and check the website to confirm the setting.
5. Customization
There are ten skins in the Minimal-Mistakes theme. The SCSS skin files are under _sass/minimaa-mistakes/skins/ folder. To customize skin, create a _custom.scss file.
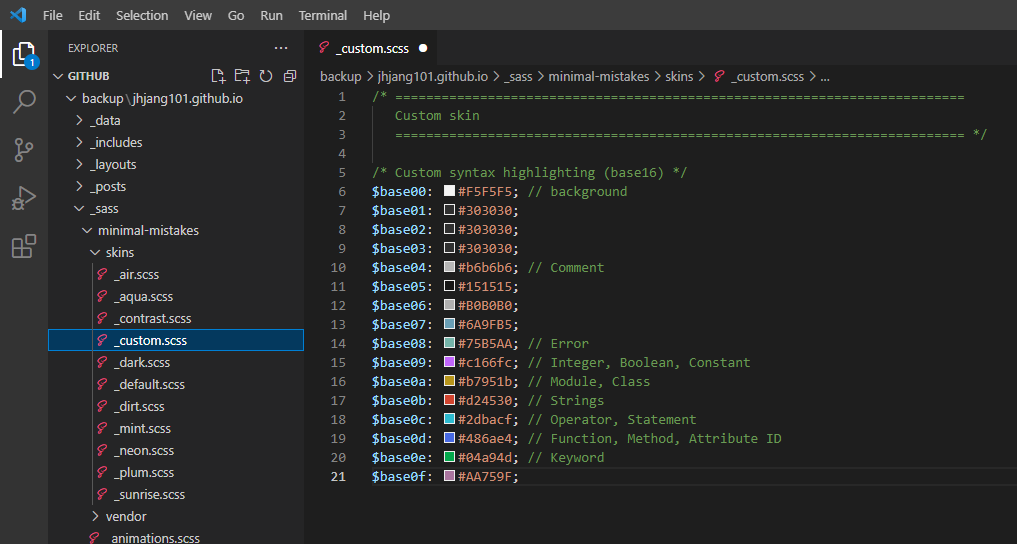
I personally like light background color for syntax, so added custom syntax highlighting colors in the _custom.scss file. Once again, change the skin in the _config.yml to "custom".